How to Fix Air Bubbles Under Anti-Slip Rubber Flooring?
1635 Views |

Why Do Air Bubbles Appear Under Rubber Flooring?
Installing anti-slip rubber flooring is a popular choice for industrial plants, commercial buildings, retail areas, and even residential spaces. It improves safety by preventing slips and falls while protecting the underlying surface.
However, one of the most common post-installation issues is air bubbles under the flooring — also known as rubber floor blistering. Many people wonder: Will these bubbles disappear on their own?
This article explains the real causes, how to fix them, and how to maintain your rubber flooring properly.
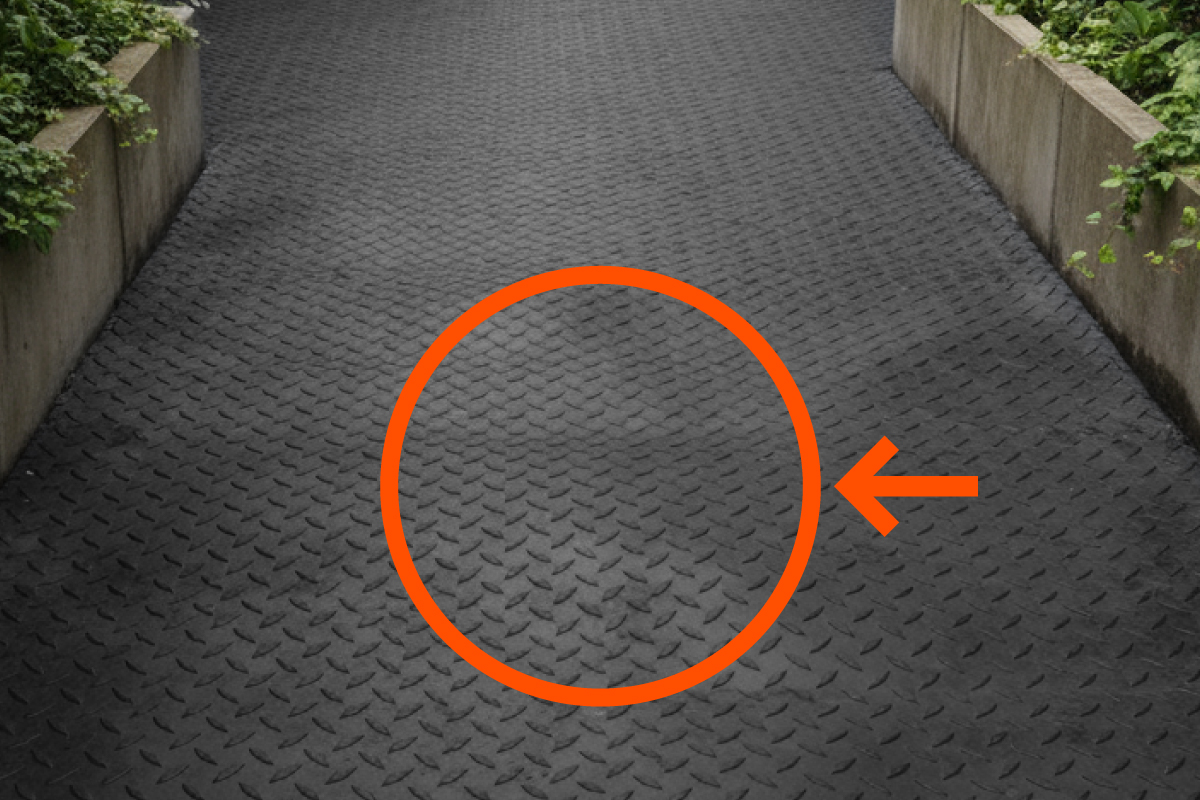
What Are Air Bubbles in Rubber Flooring?
Air bubbles are pockets of trapped air between the subfloor, the adhesive layer, and the rubber sheet, causing certain areas to rise or bulge. They usually appear shortly after installation and are caused by trapped air, residual moisture, or thermal expansion and contraction over time.
The good news — this problem is controllable if you choose high-quality materials and follow the correct installation process from the start.
3 Main Causes of Air Bubbles in Anti-Slip Rubber Flooring
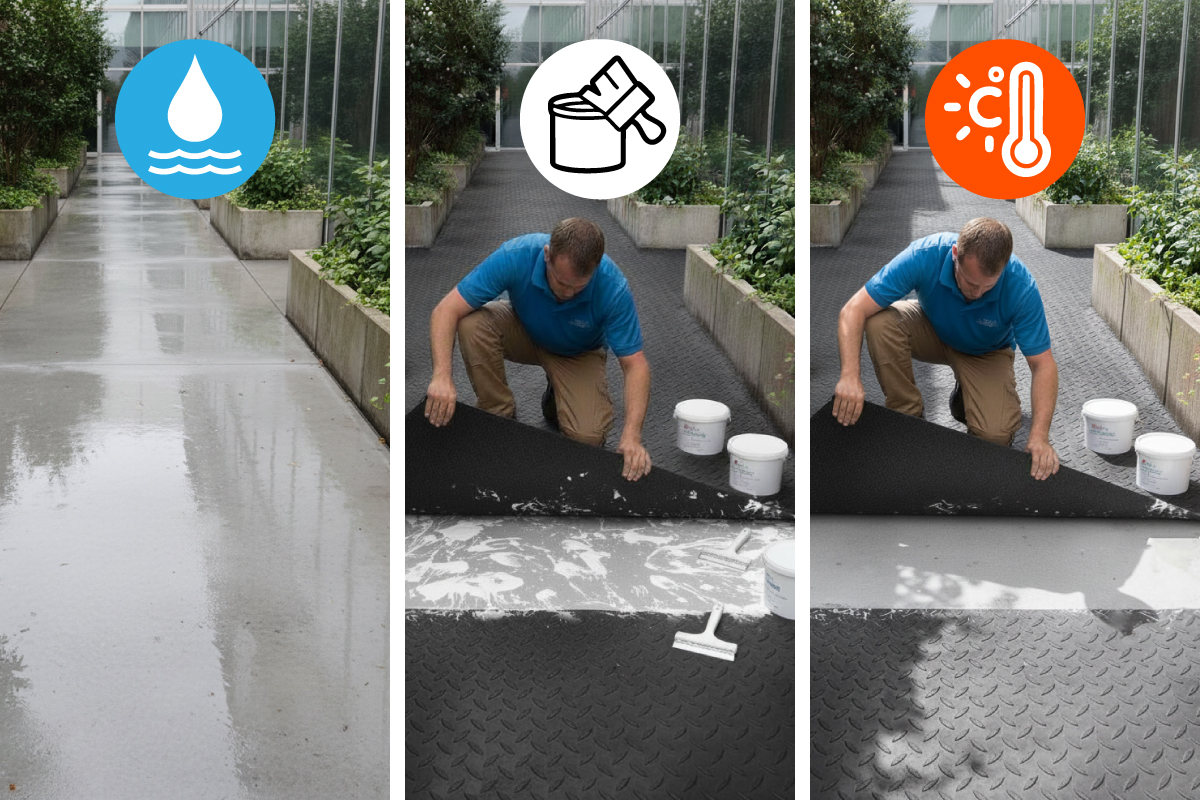
1. Moisture in the Subfloor
Concrete floors that are not completely dry can release vapor after installation. This vapor builds pressure under the adhesive layer, forming bubbles — the most common cause of flooring blisters.
2. Uneven Adhesive Application
If adhesive is applied too thick, too thin, or unevenly, it can leave vacuum points between the glue and the flooring, which trap air when stepped on or exposed to pressure.
3. Temperature and Pressure During Installation
Installing in areas exposed to direct sunlight or high heat can cause trapped air to expand.
If the air is not rolled out before the adhesive cures, bubbles may become permanent and grow larger over time.
Will Air Bubbles Under Rubber Flooring Go Away on Their Own?
It depends on the cause and size of the bubbles:
May disappear naturally :
Small bubbles caused by trapped air during installation (not moisture) may flatten out within 1–2 weeks, especially in high-traffic areas where pressure helps release trapped air.
Will not disappear naturally:
Bubbles caused by moisture or poor adhesive application will not go away on their own. In fact, they often expand over time, eventually causing delamination or permanent deformation of the flooring.
How to Fix Air Bubbles or Blisters in Rubber Flooring
For Small Bubbles
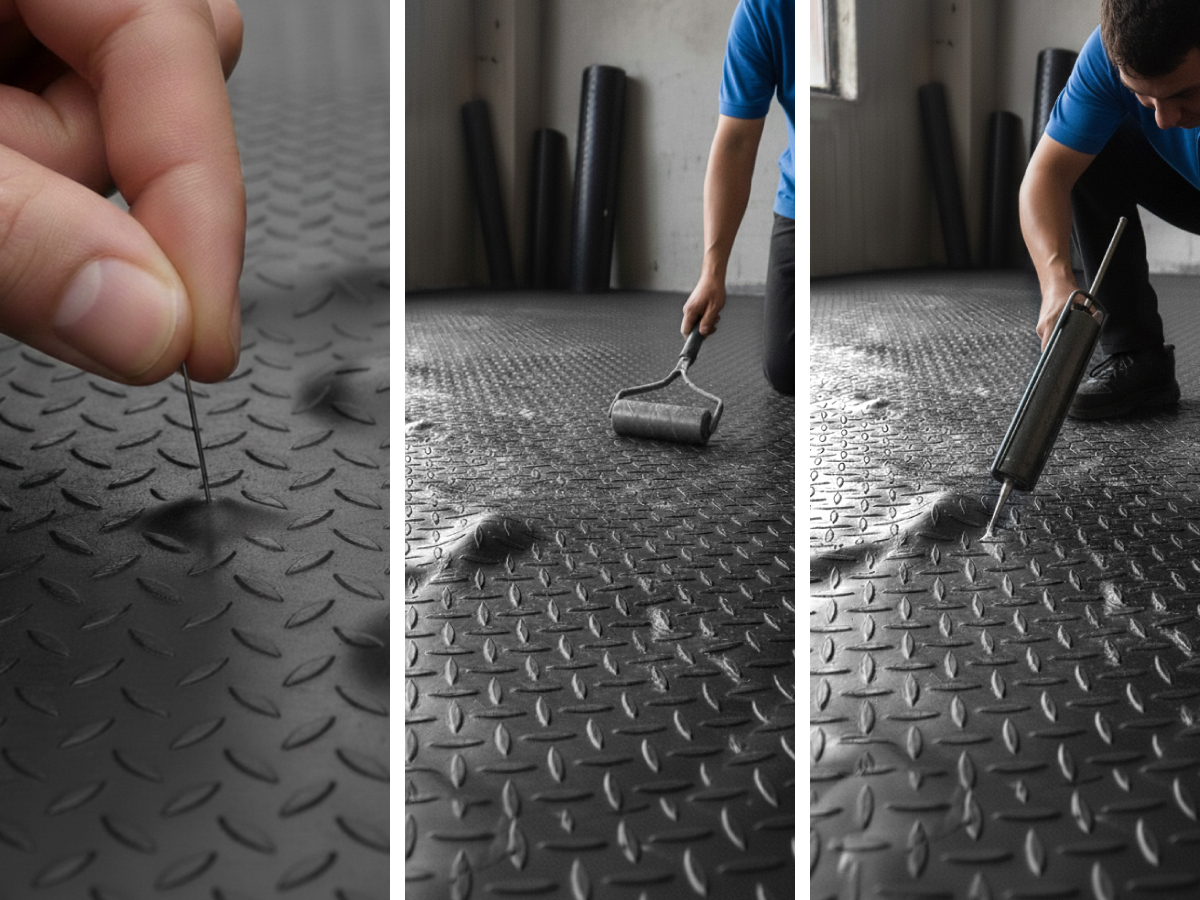
1. Use a fine needle or a utility knife to gently puncture the bubble and release the air.
2. Roll the area with a clean floor roller to remove trapped air.
3. If necessary, inject a small amount of high-quality rubber adhesive into the puncture before rolling again.
For Large or Multiple Bubbles
Lift the flooring around the affected area and inspect the cause (moisture or adhesive issue).
2. If moisture is present, remove the flooring and let the surface dry completely. Apply a Moisture Barrier Primerbefore reinstalling.
3. Reinstall using the proper rubber adhesive, ensuring even coverage.
4. Roll firmly and allow at least 24 hours for the adhesive to fully cure before use.
5 Tips to Keep Rubber Flooring Smooth, Safe, and Long-Lasting
1. Choose high-quality materials: Use anti-slip rubber flooring with consistent density and moisture-cured quality from a trusted manufacturer.
2. Inspect the subfloor first: Make sure it is completely dry, clean, and level before installation.
3. Use the right adhesive: Match the adhesive type to your rubber flooring and surface condition.
4. Avoid extreme temperatures: Don’t install on overly hot days or in direct sunlight.
5. Handle with care after installation: Avoid dragging heavy objects or using harsh chemicals, especially within the first 7 days.
Small Bubbles, Big Warning Sign
Air bubbles under rubber flooring are a clear sign of improper installation and can affect both durability and safety in the long run.
By choosing high-quality materials and working with experienced installers, you can prevent this problem almost entirely.
A perfect rubber floor starts with a solid foundation and proper installation.

Need Professional Advice?
- LINE: @ptirubber
- Email: info@ptigroups.com
- HyperSheet® | Engineered for Durability.


